Support and Resistance Explained
Support and resistance are areas where price previously changed behavior. They help traders prepare for reactions without pretending to know the outcome.
Support is an area where buying previously became strong enough to slow or reverse a decline. Resistance is an area where selling previously slowed or reversed an advance. Treat both as zones, not guaranteed barriers.
Why Reactions Occur
A price area can matter because:
- participants remember it;
- unfilled orders remain nearby;
- traders who missed the move wait for another opportunity;
- losing participants exit when price returns;
- it aligns with value, structure, or a widely watched reference.
The reaction is what confirms importance. A line on a chart has no power by itself.
Support and Resistance Can Change Roles
When resistance breaks and price holds above it, that area may become support. When support breaks and price remains below, it may become resistance.
This role reversal is useful because it shows whether the market accepts price on the other side of a previously defended zone.
Mark Zones, Not Exact Lines
Markets rarely reverse at the exact same price repeatedly.
Build a zone around:
- repeated swing reactions;
- clusters of candle bodies and wicks;
- range boundaries;
- high-volume or value areas;
- prior breakout bases.
Keep the zone narrow enough to be useful but wide enough to reflect normal variation.
Prioritize Important Areas
Strong zones often have:
- clear reactions;
- repeated tests without excessive overlap;
- higher-timeframe relevance;
- confluence with structure or value;
- enough distance from nearby competing zones.
Zones weaken when price repeatedly trades through them. Too many tests can consume available orders.
Levels provides objective VWAP-based reference areas. Golden Vein and Ranger add useful value and range perspectives.
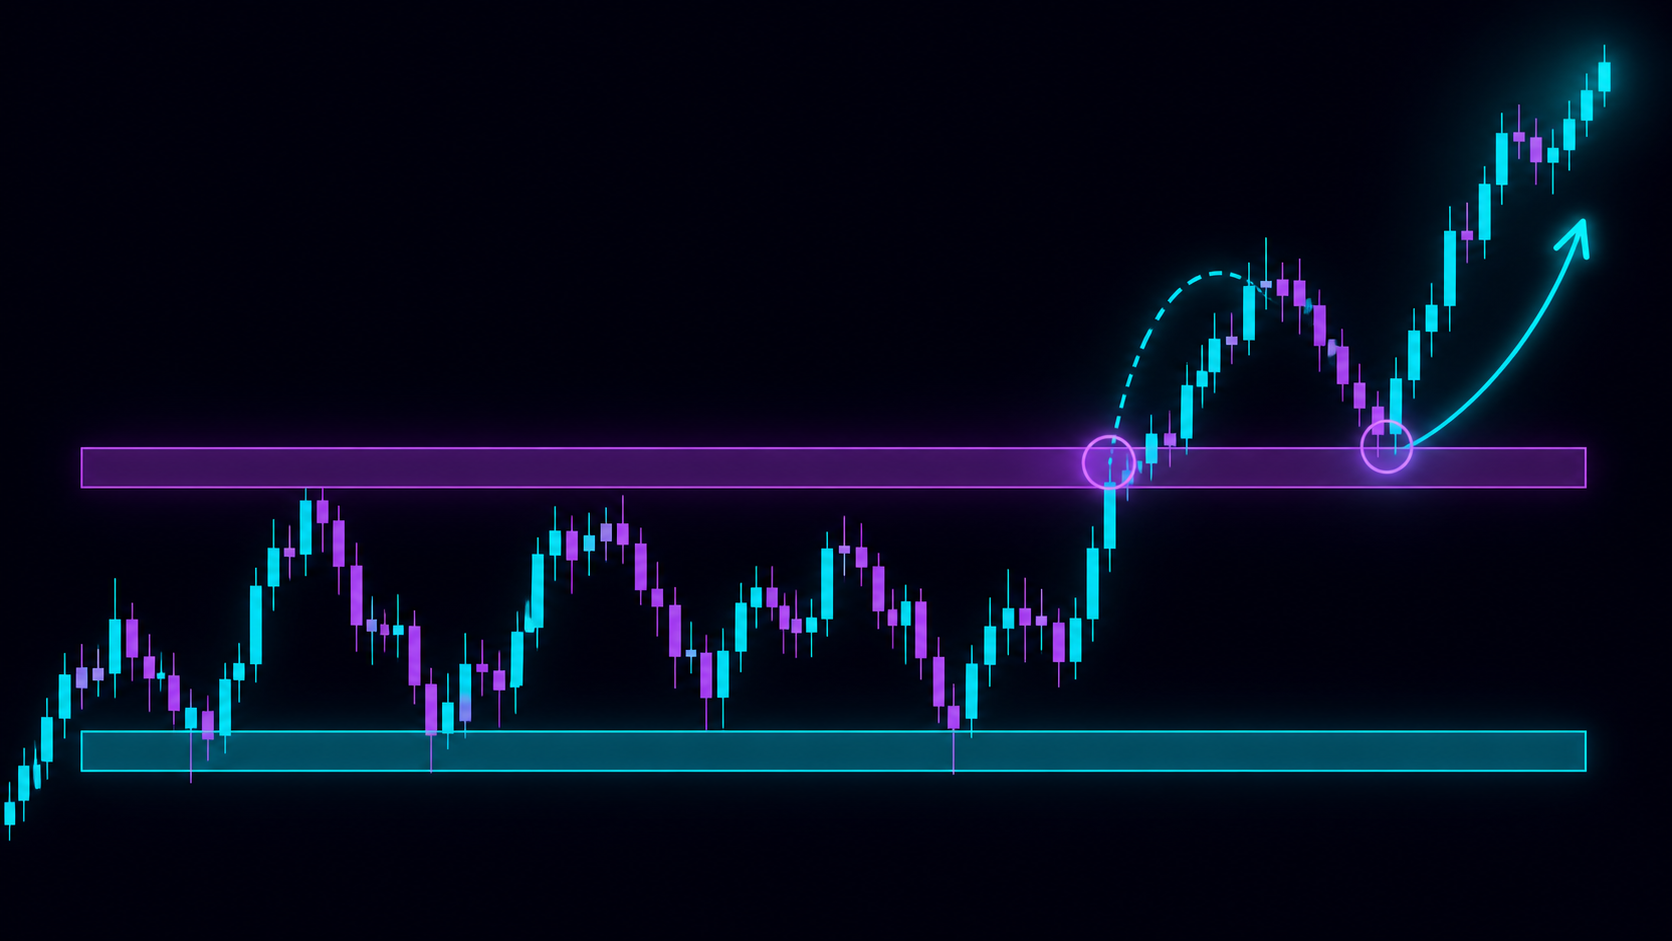
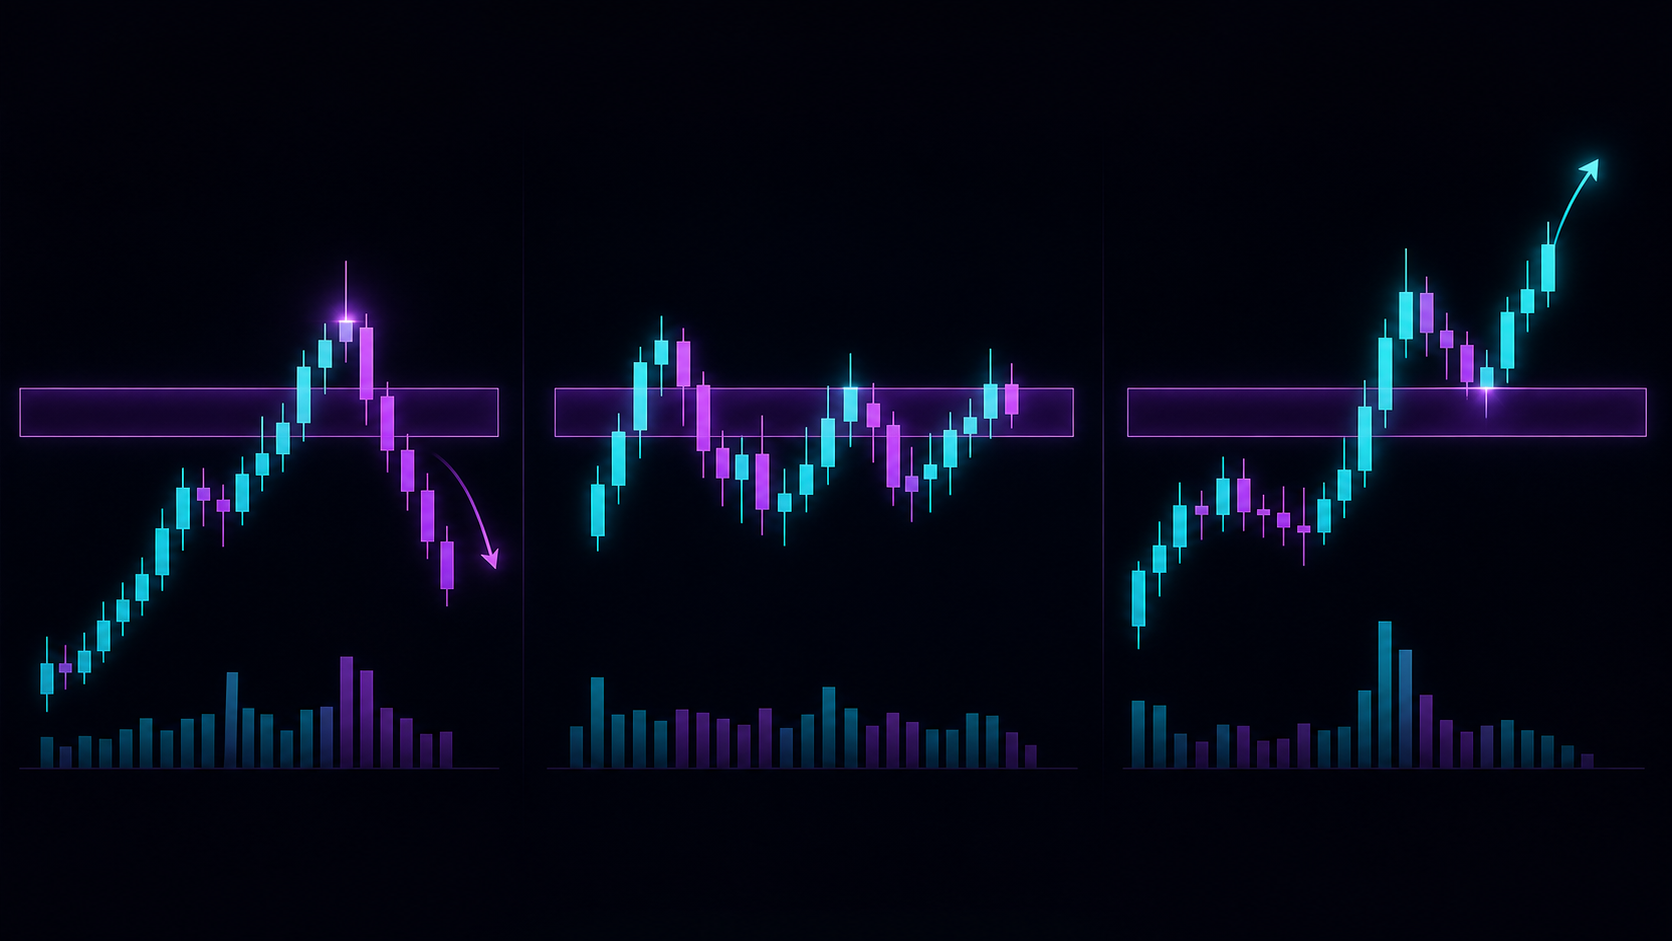
Three Ways Price Interacts With a Zone
Rejection
Price enters or approaches the area, fails to hold through it, and moves away.
Acceptance
Price spends time and trades repeatedly inside or beyond the area. This suggests the market is becoming comfortable there.
Breakout and Retest
Price leaves the zone, then returns to test it from the other side. A successful retest can support continuation; failure can return price to the previous range.
Common Mistakes
- Drawing a line at every turning point.
- Assuming support must hold.
- Buying support before observing behavior.
- Ignoring the next nearby resistance.
- Treating a wick through a zone as automatic failure.
- Moving a zone after every losing trade.
A Practical Zone Checklist
Before acting near a level, ask:
- Is this zone obvious on the decision timeframe?
- How did price react here previously?
- Is price approaching with strength or weakness?
- Is the market trending or ranging?
- What confirms rejection or acceptance?
- Where is the idea invalidated?
Key Takeaways
- Support and resistance are reaction areas, not guarantees.
- Broken zones can reverse roles.
- Higher-timeframe and repeatedly respected zones often matter more.
- Rejection, acceptance, and retests reveal how price treats a zone.
- Keep charts selective and uncluttered.
Continue Learning
- Study breakouts, retests, and failed breakouts.
- Learn range trading.
- Explore Levels for objective reference areas.
Support and resistance can fail without warning. Use confirmation, invalidation, and controlled position size.